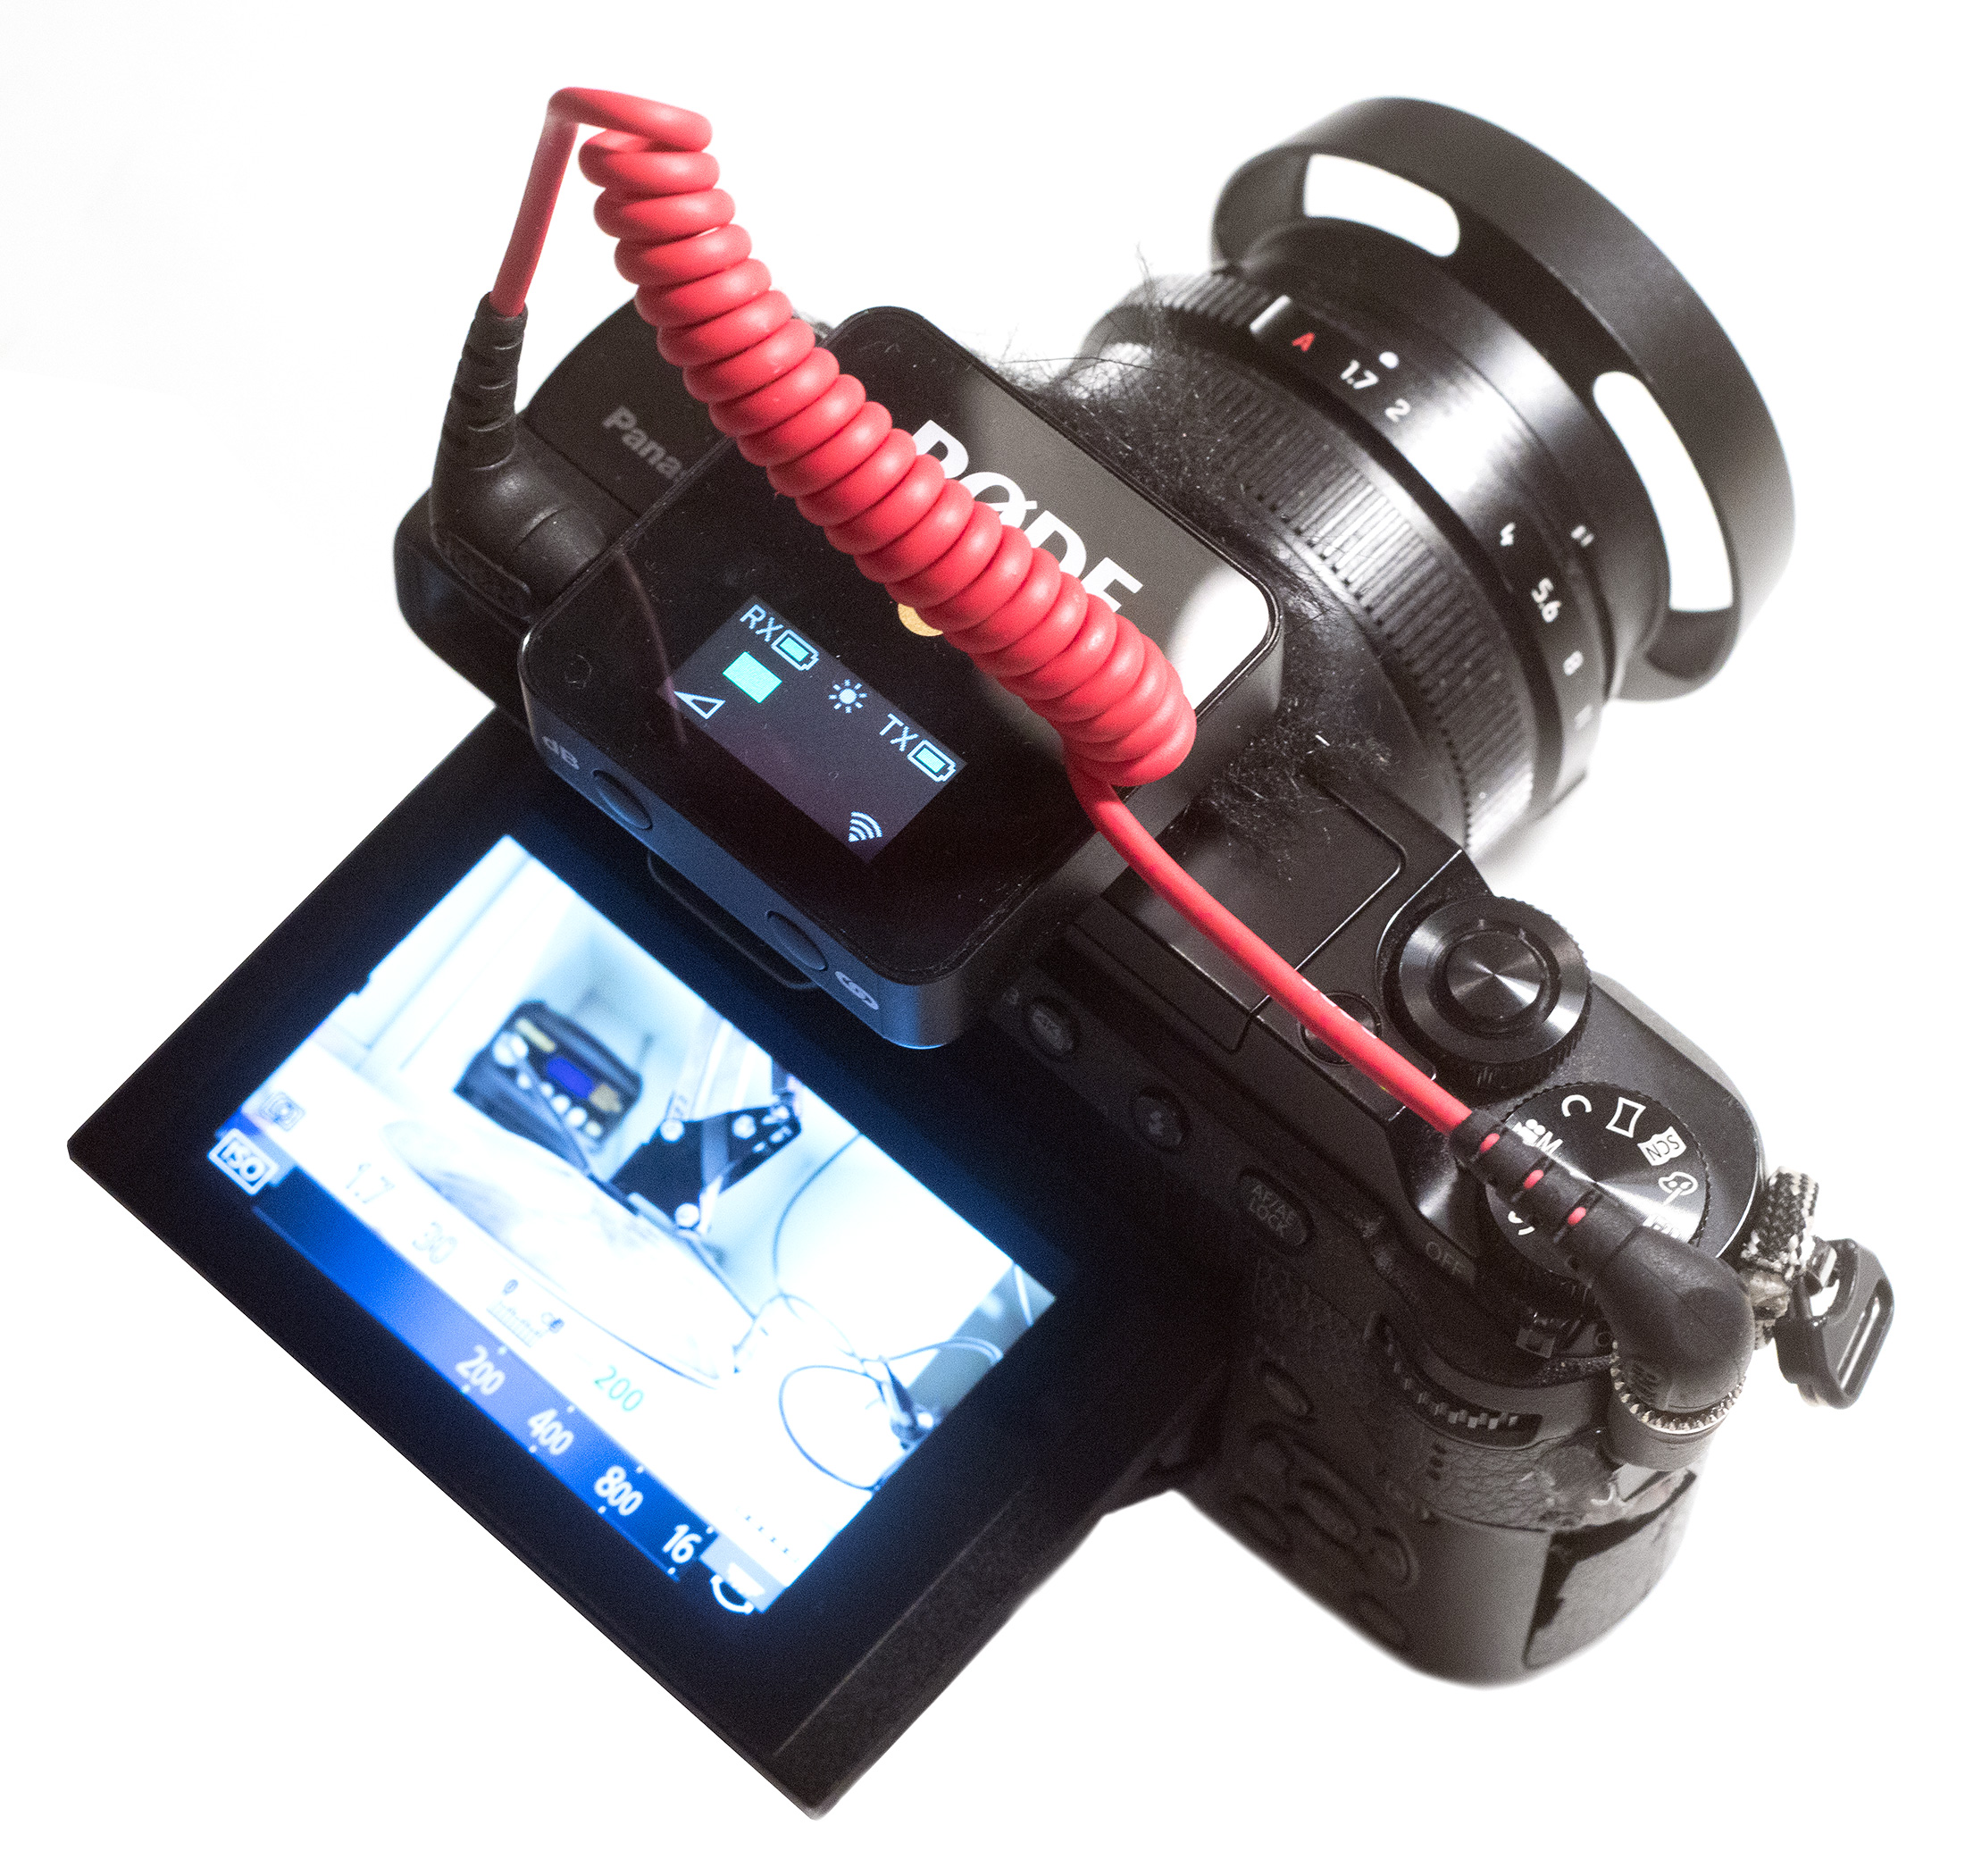
I love my Panasonic Lumix GX85 mirrorless camera, it can do 4K video, has IBIS and the 15mm Leica lens is awesome. Both the lens and camera are small making the whole setup super portable. There is one massive downside though, the camera is lacking the mic input making it a pain to get good audio. You have to use an external recorder and sync the audio and video in post.
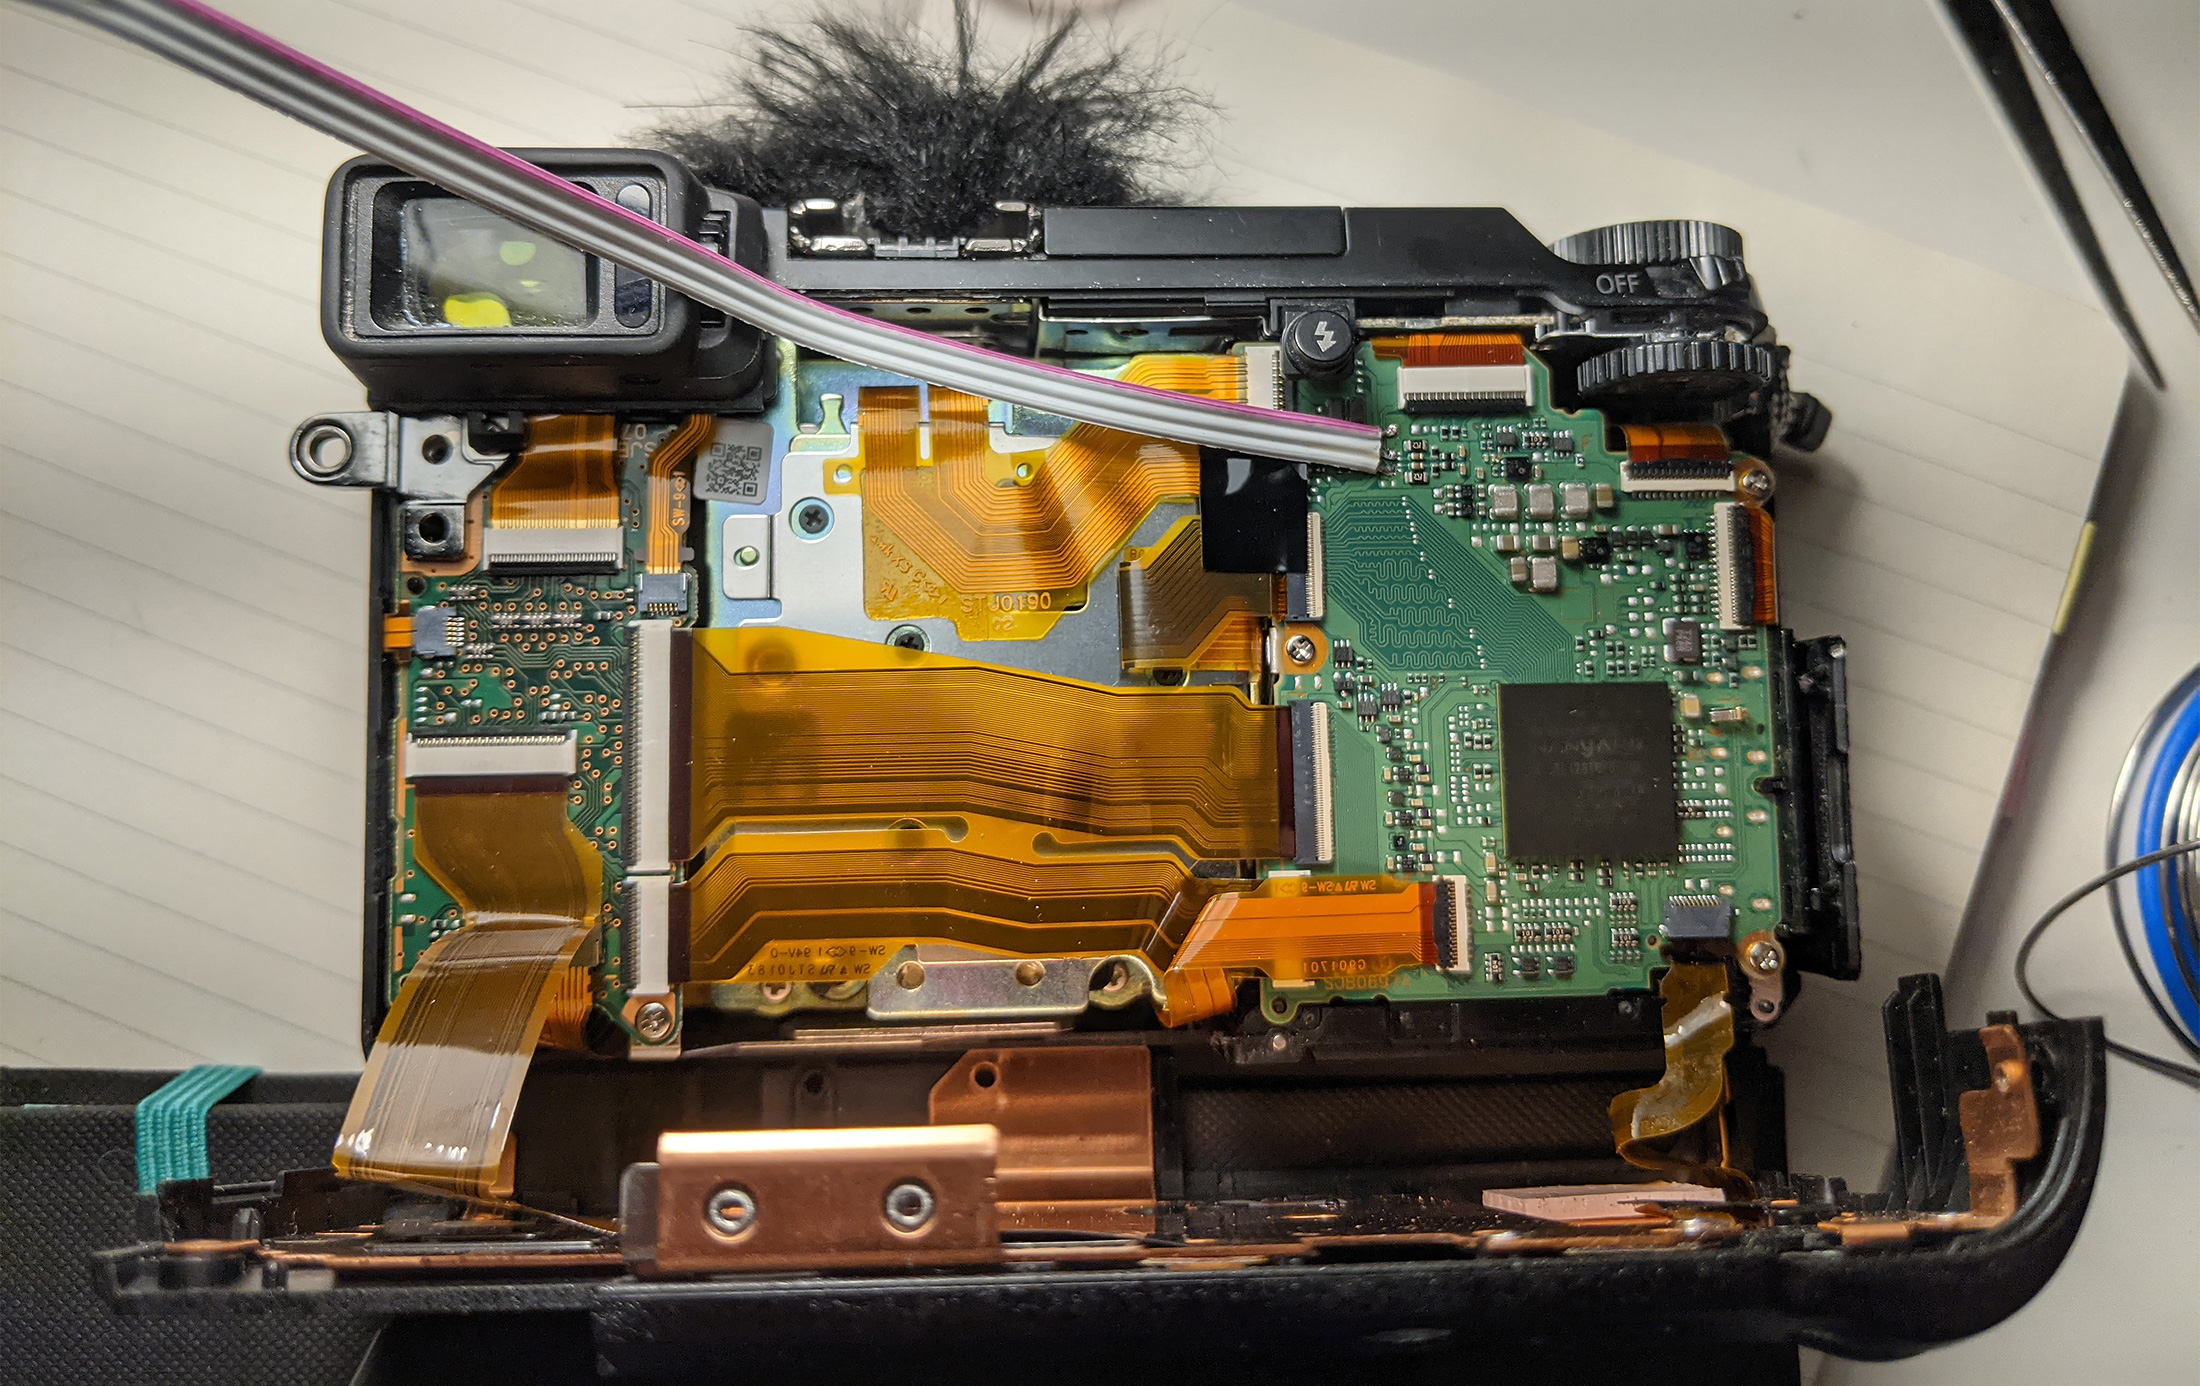
This has been on my mind since I bought the camera a couple of years ago. I have searched the web and the external microphones have been mentioned by other people, but nobody actually shared a solution. For some time, I was hesitant to poke around inside the camera, but I’m glad that I eventually did.
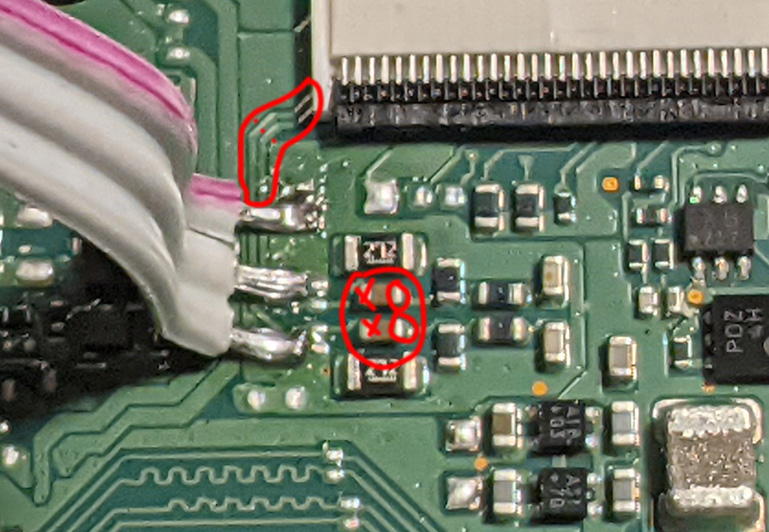
It is now possible to use an external mic with the Panasonic Lumix GX80/85 by soldering a microphone jack to the three test pads on the main circuit board of the camera.
DISCLAIMER: The actions described here will most likely invalidate your warranty and as there is a flash capacitor in this camera — there is a risk of getting an electric shock. I take no responsibility if you hurt yourself or break your camera. Don’t do it, I warned you.
I found a page that helps with disassembly:
(be very careful when opening the camera as there are flex cables you don’t want to rip)
And a page where the schematics are shared:
(the LUMIX GX85 Service Manual.pdf service manual pdf is particularly useful)
On page 60 of the service manual we can see the schematic for the microphone array. On page 67 we find the location of the flex cable on the PCB and can identify the pins responsible for the mic inputs.
Upon closely inspecting the area of the main circuit board near the flex connector — I couldn’t believe my luck when I saw the symmetrical components around the two lines that looked like the voltage divider and the line filter components from the schematic. Both lines had test pads on them making it easy to get in there with my oscilloscope probes.
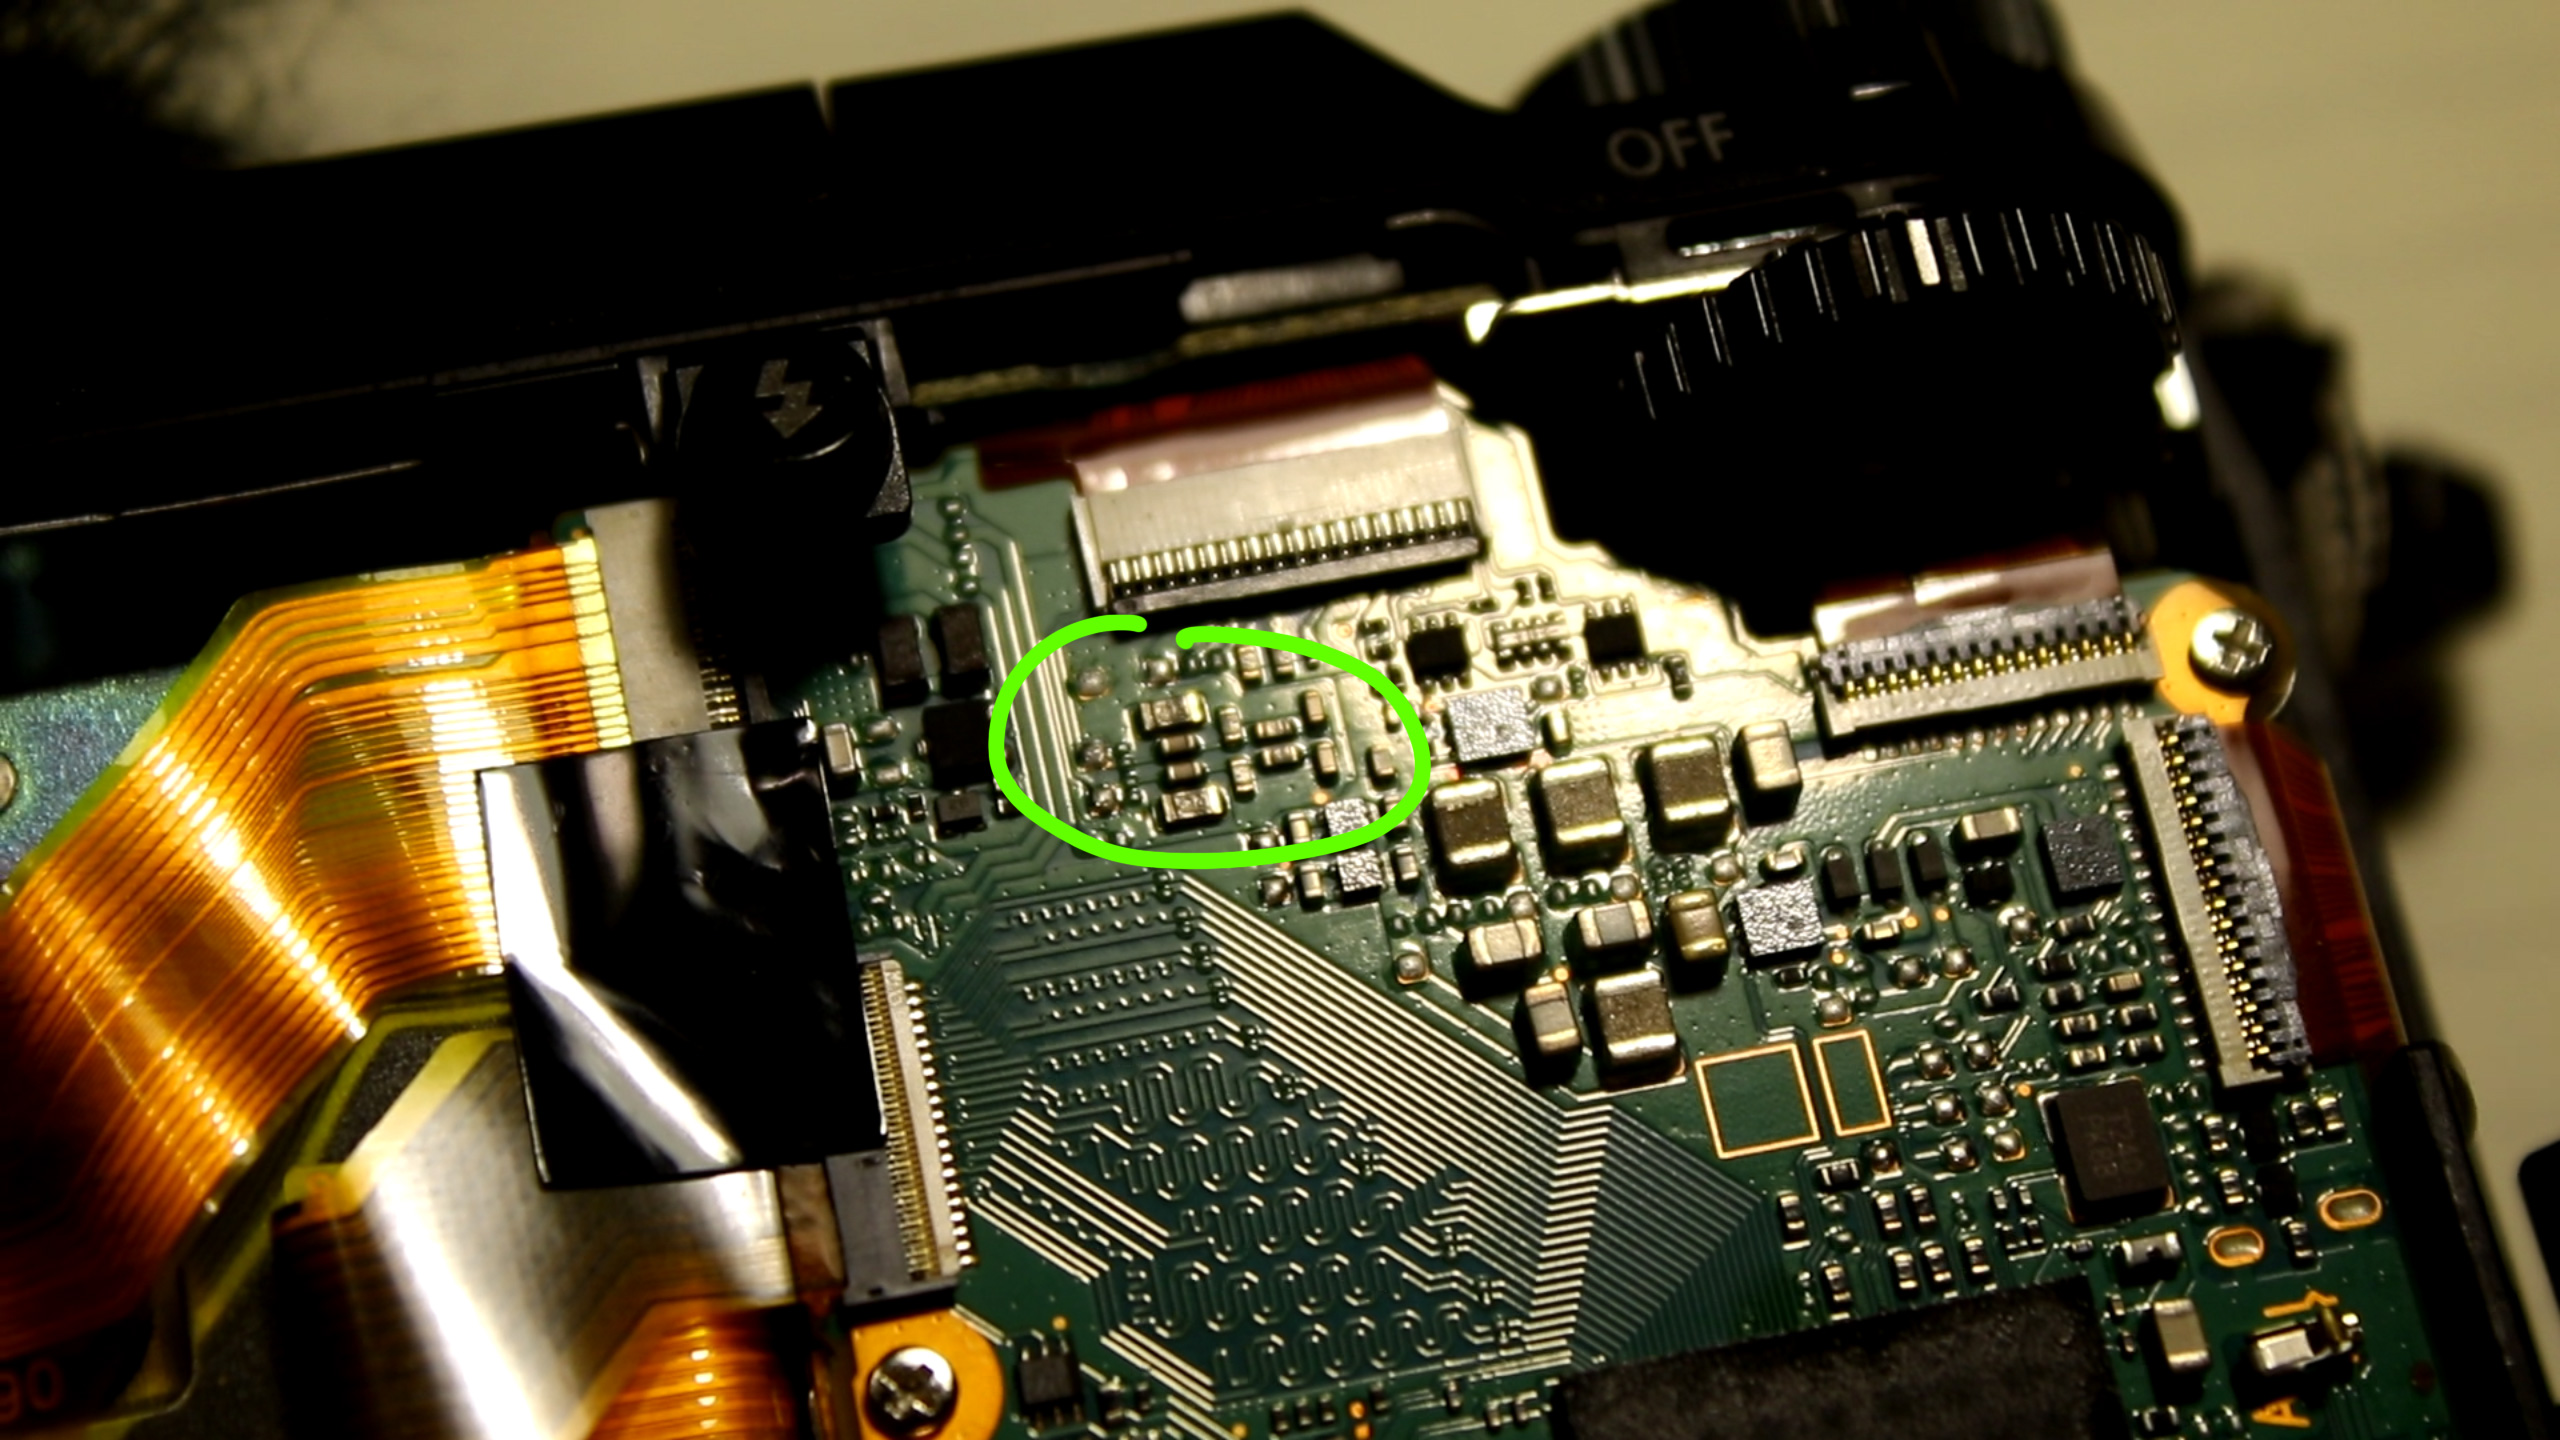
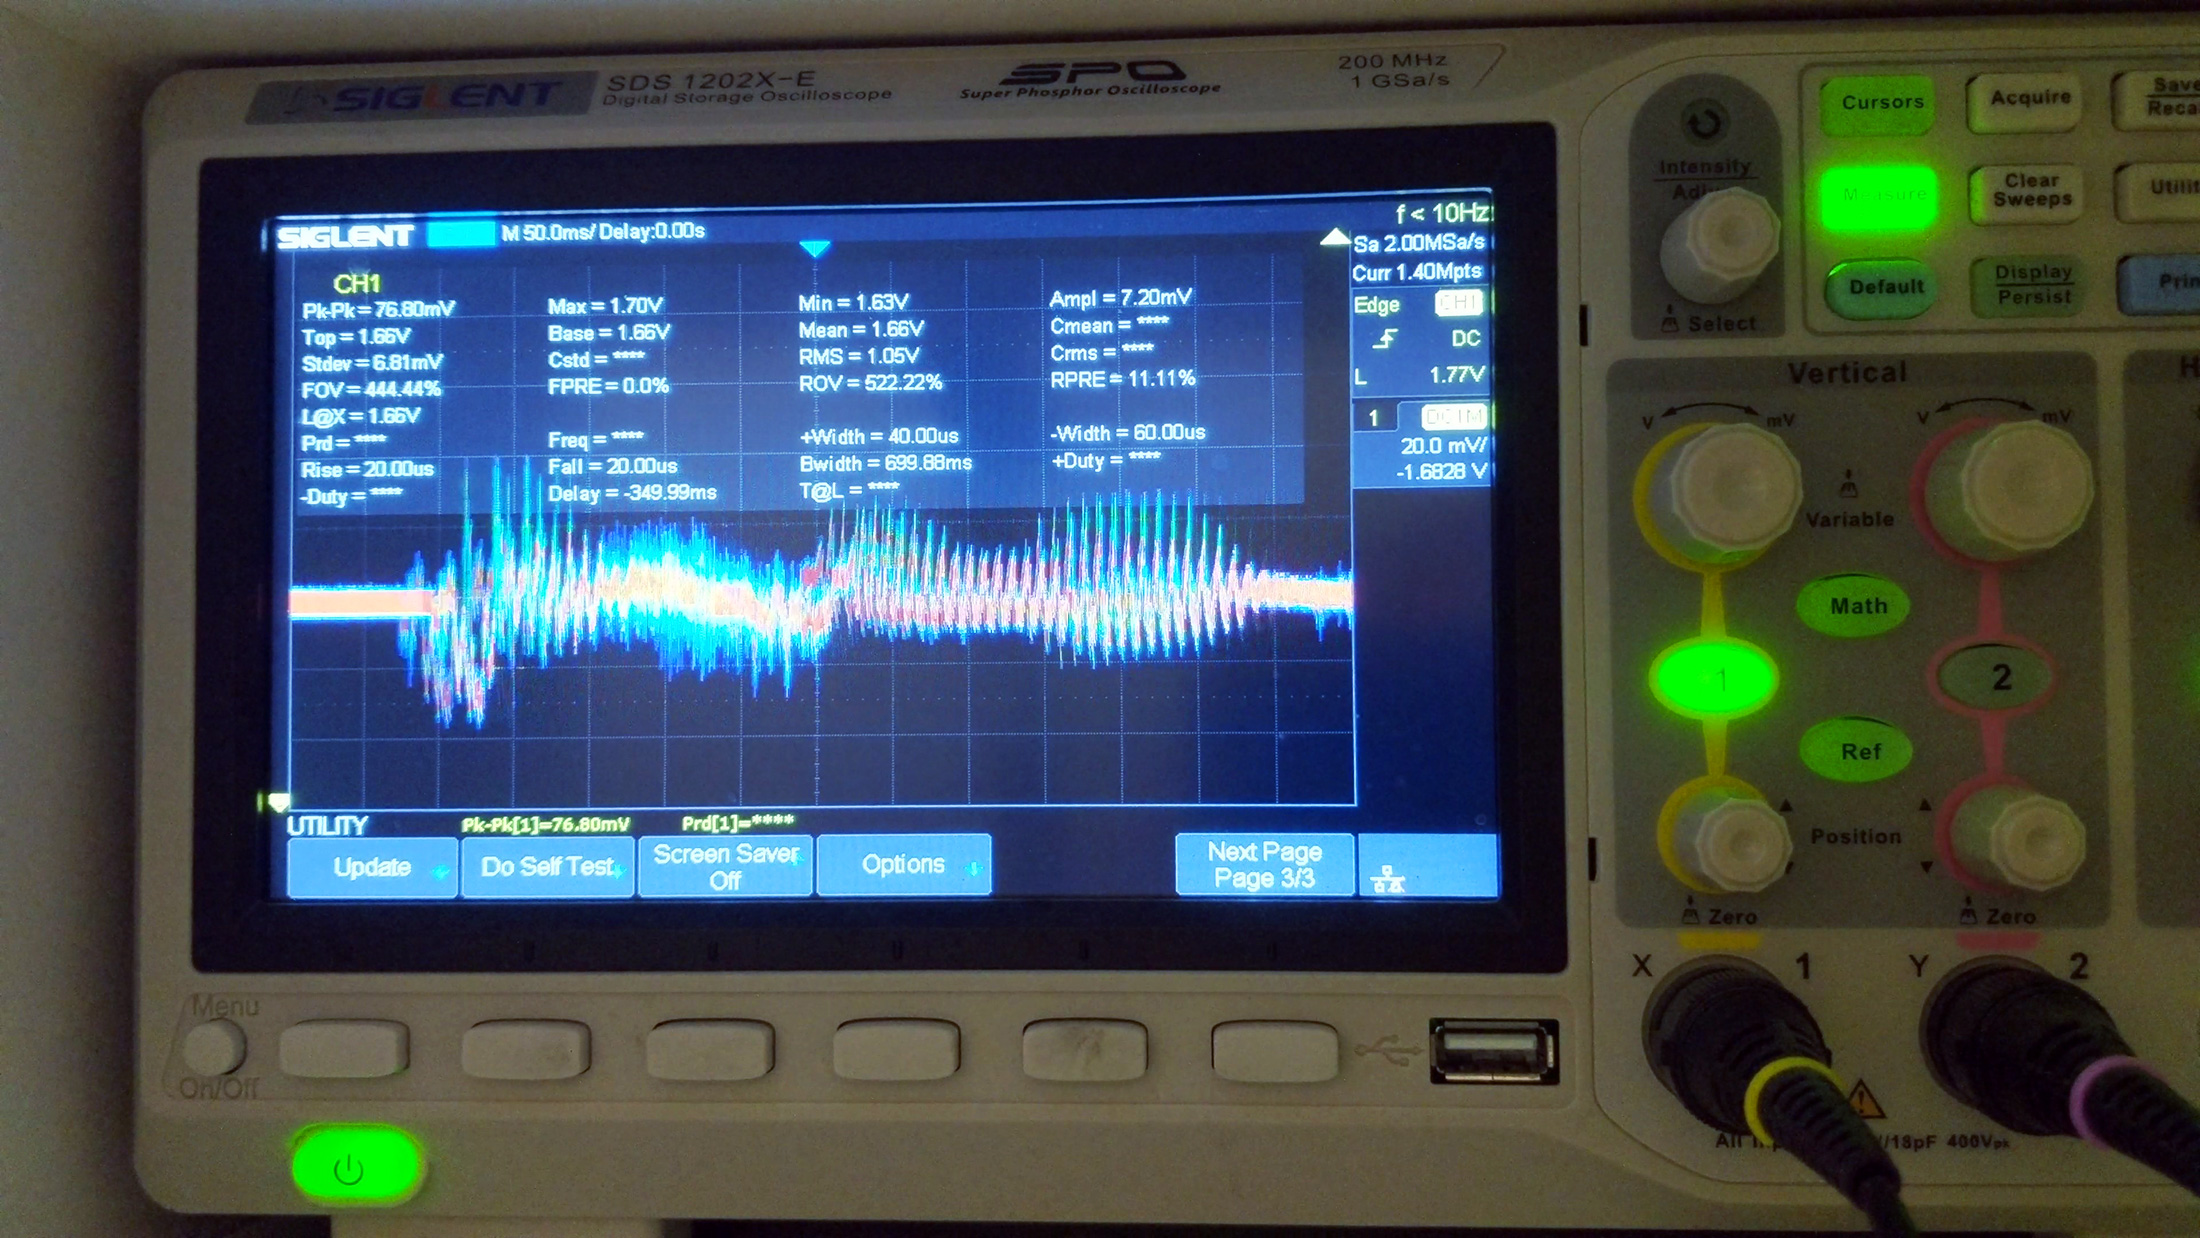
I turned the camera on and measured the lines against the other pad that was near by. Surely enough it turned out to be the common for both mic lines. When poked with the oscilloscope probes, we can see the lines are 1.7 volts and the audio waveform is being picked up.
And now we have a pinout with some nice solder pads to hook into.

Note, the locations of the left and right channels are assumed from the manual, I’ve not actually checked that left is left and right is right. If I need to swap the stereo input later on, the header jack I’ll be using will allow me to do it without disassembling the camera.
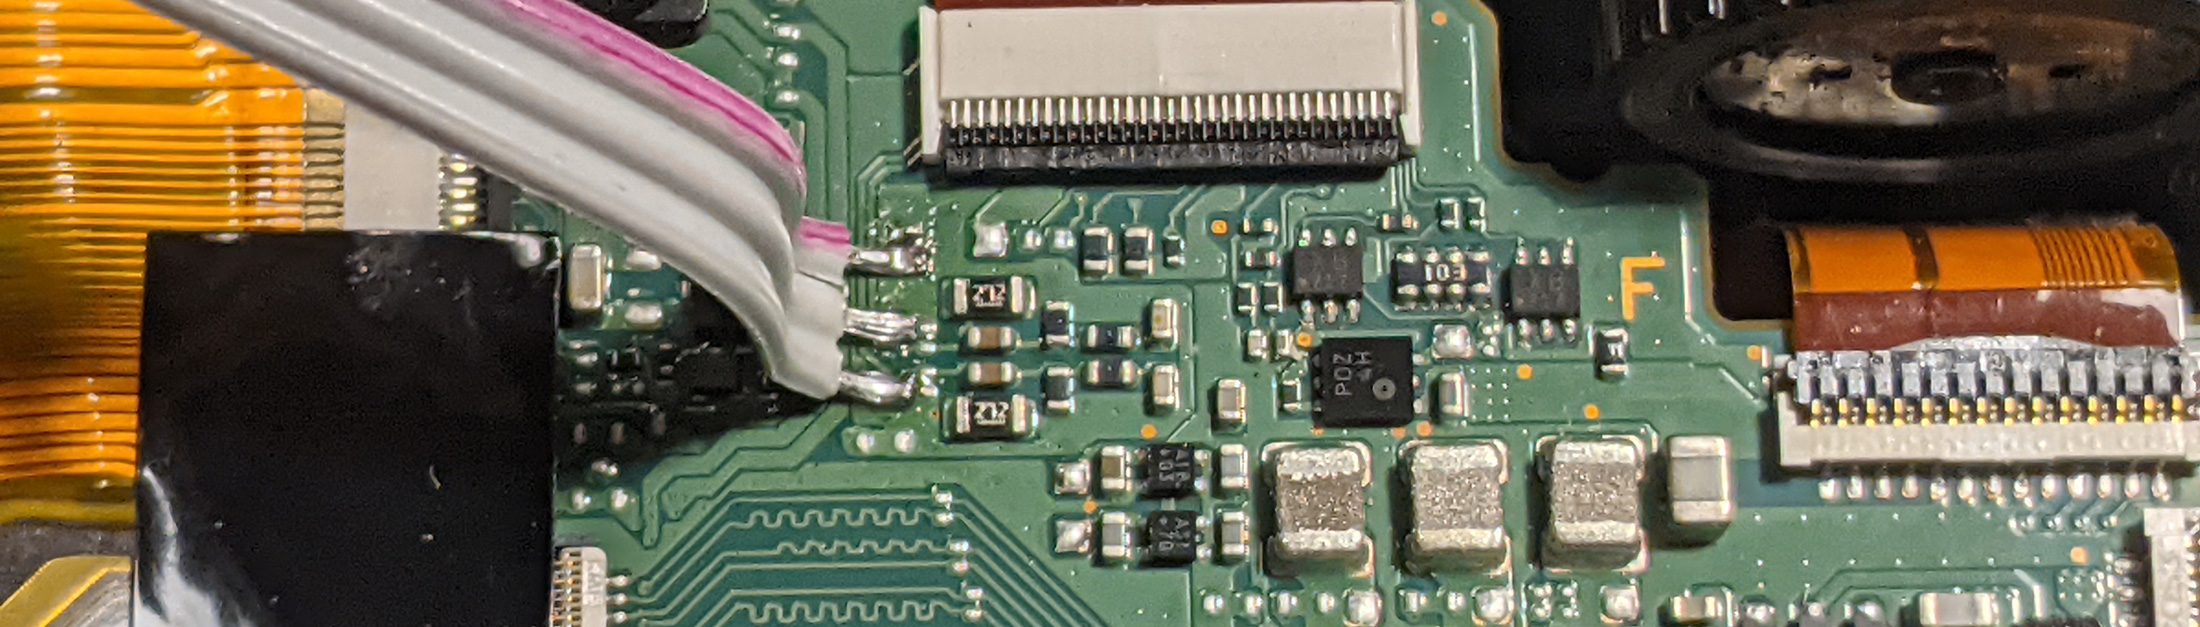
I’ve used a length of 3 wires separated from a 40-pin ribbon cable and soldered one end to the pads. I’ve tried taking the wires via the existing connection port (which works however a longer cable is required to get to the mic mounted on the hot shoe.) I’ve changed my mind and moved the exit point closer to the viewfinder to get closer to the hot shoe mount.

After a quick test, I confirmed that the audio is actually picked up via the new connection. I’ve used the Rode Wireless Go microphone which appears to dominate the sound picked up by the built-in microphones (they are still connected). This is quite handy as once the external source is unplugged, the built-in microphones become the main source of audio. I’ve tried to connect a passive lapel mic made by Sennheiser but it wasn’t as loud as the Rode Wireless Go. I’m guessing different mics will behave differently based on the spec but powered mics will probably work best. Let me know if you try other mics.
To completely disable the built-in mics one could cut the traces going from the test pads to the flex.
With a bit of pressure, the camera closes and the wire fits between the viewfinder and the back cover.
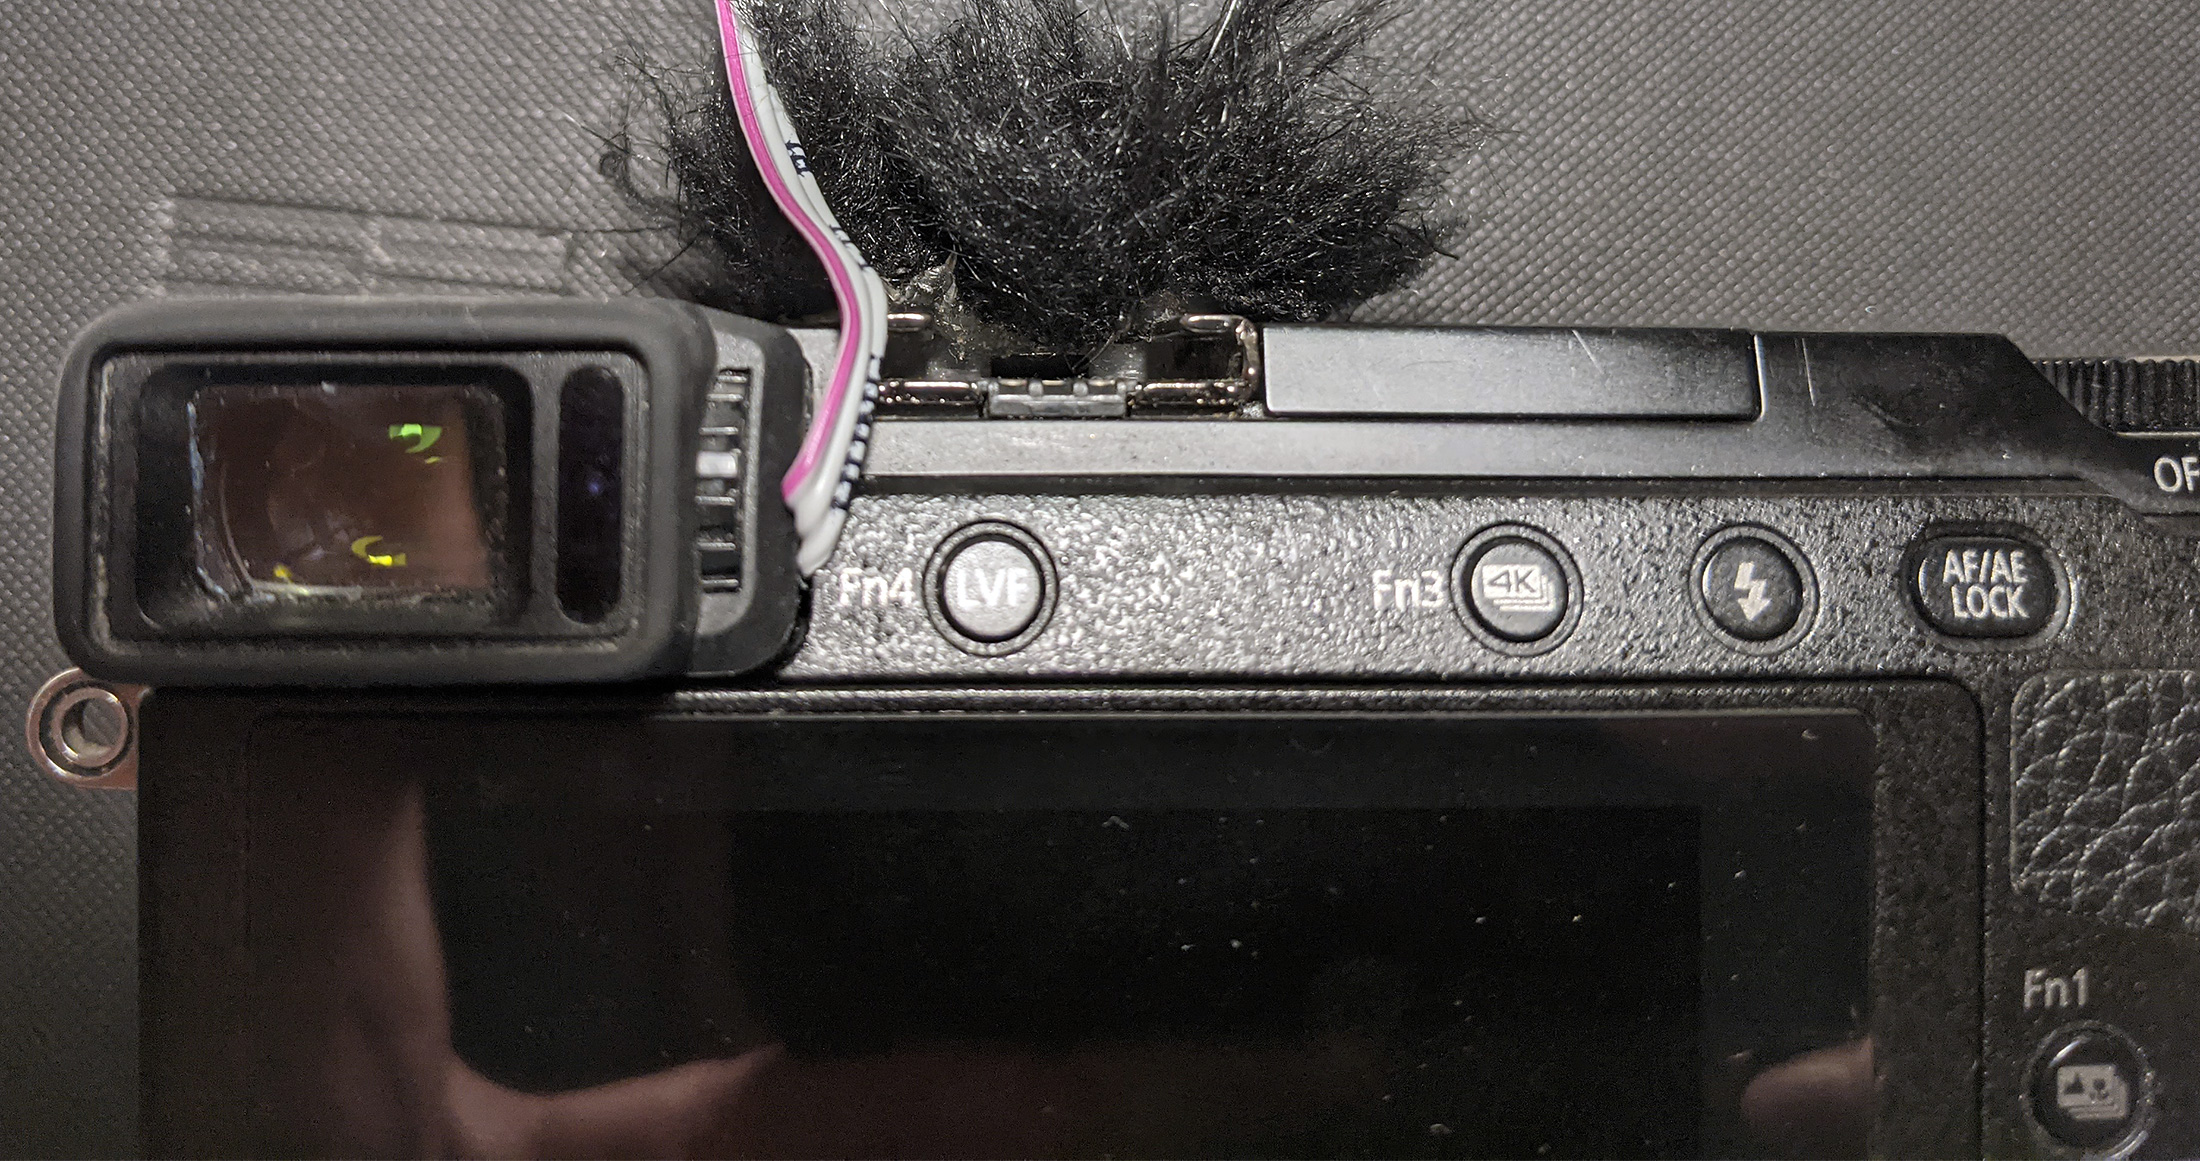
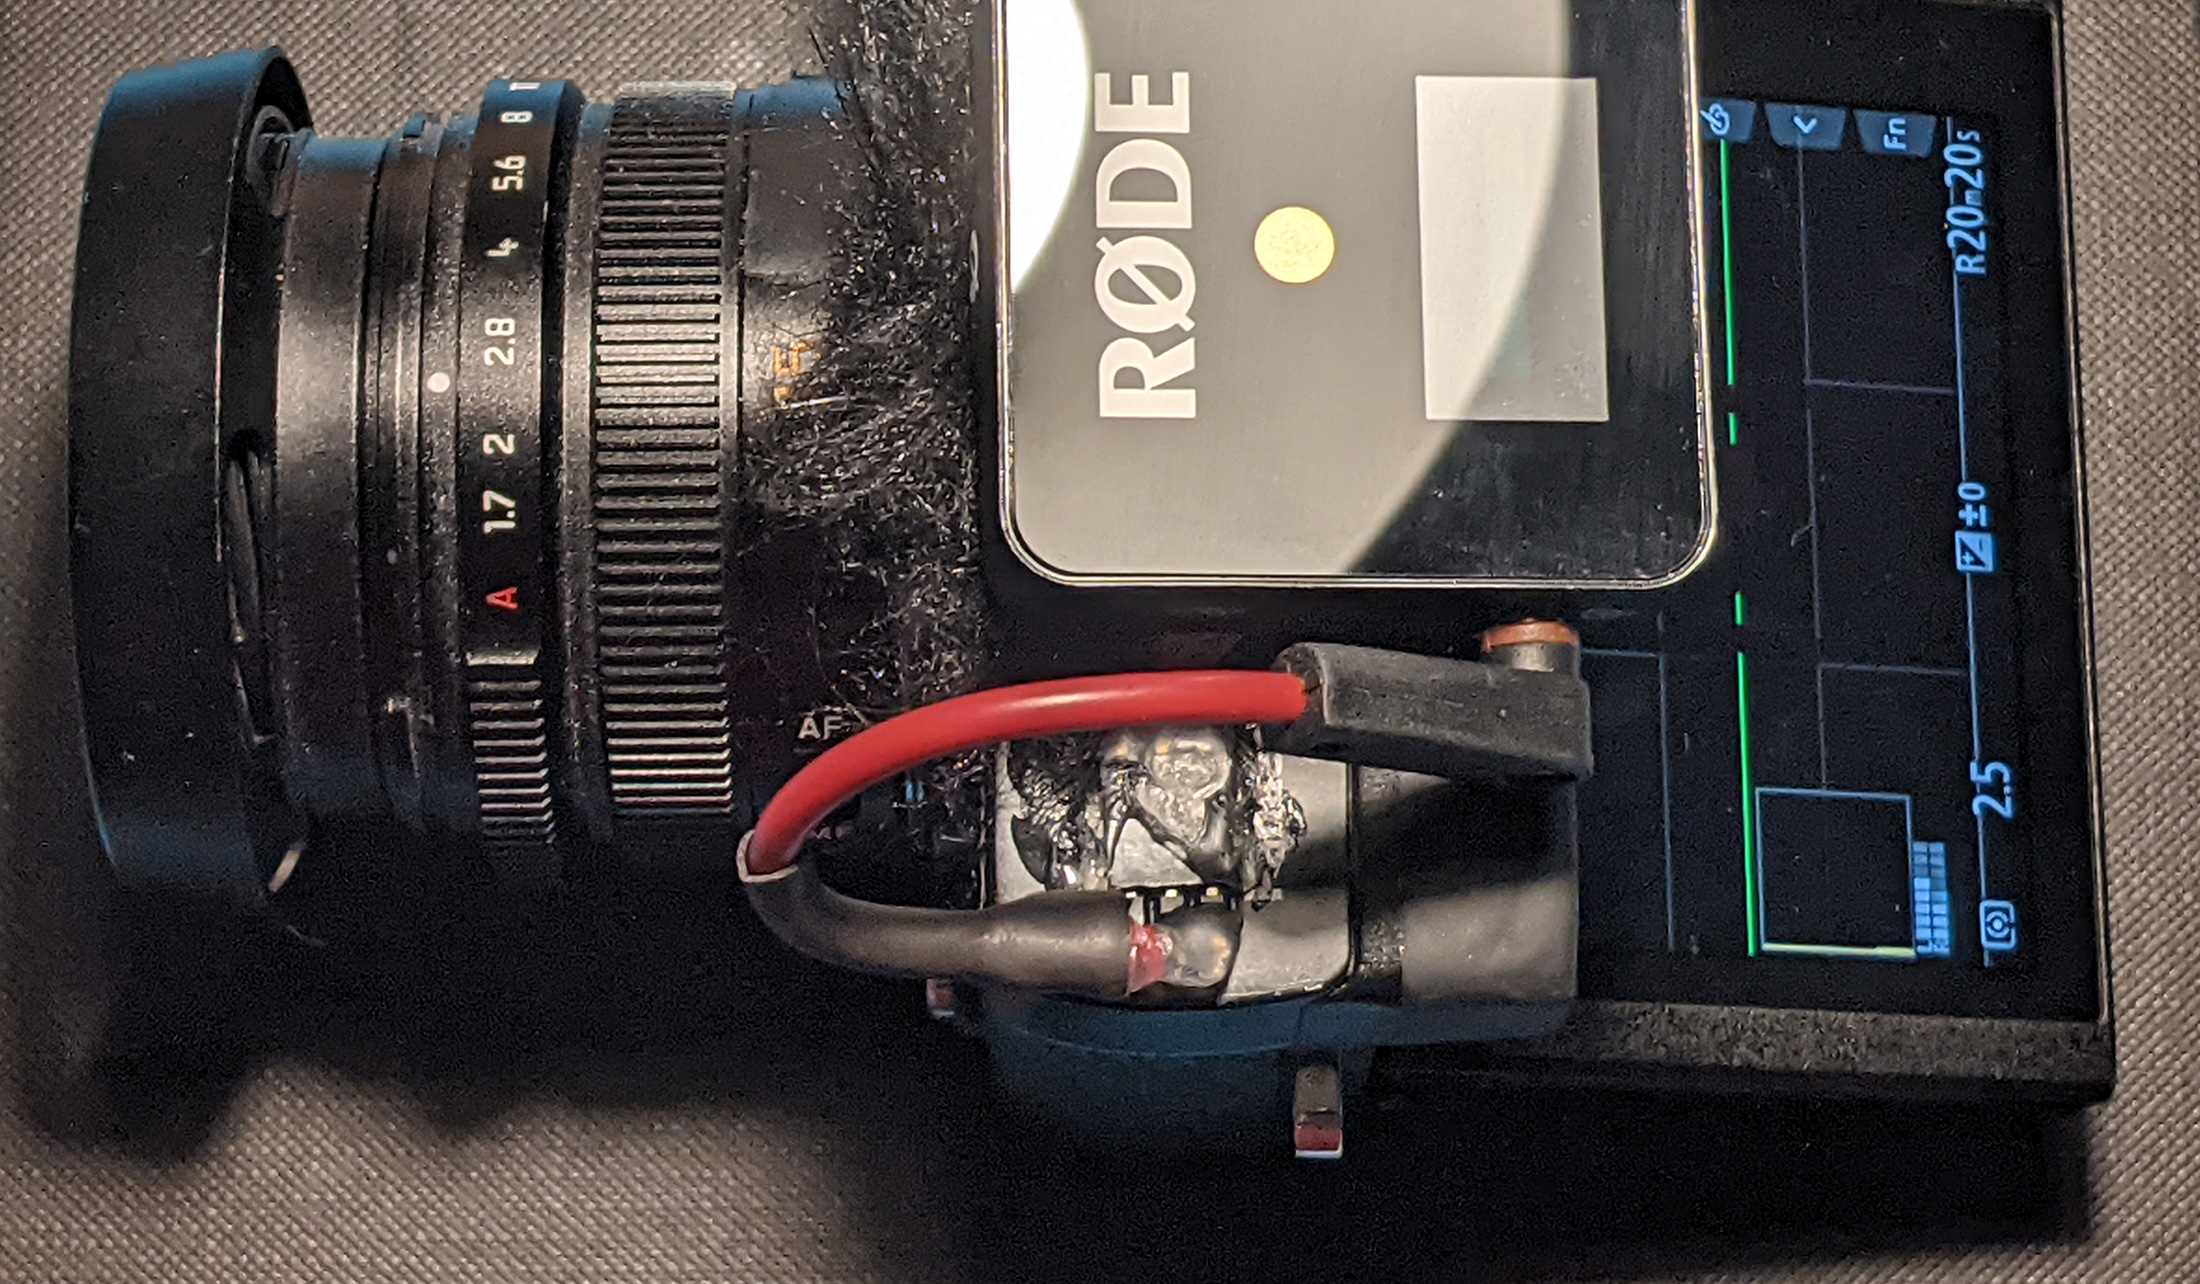
I’m using a 3x 2.54 mm female header glued to the top of the camera to connect to the external mics as its flat and low profile, and that’s what I have available. I’ve made the centre pin the ground so no matter which way its plugged in, there will be audio on both channels. The male header is soldered to an audio jack that plugs into the microphone. Its also possible to use a female 3.5 TRS connector on the camera side but it is much bigger and gets in the way.
This is my final setup.
I may move the cables or use a different connector in the future, thankfully all the actions are reversible.
Enjoy this little DIY modification of the Lumix GX85. If you want to ask questions, please use twitter @webboggles.
Hi Ilya,
Could you tell me the specific female header that you used? I couldn’t find it on google. I’m trying to do the same to my GX85. Also, how would you disconnect the internal mic?
Thanks,
Bobby
Hi Bobby, I have used a 3 pin 2.54 mm header. The female side connected to the camera with the ground pin in the middle so that reversing the connection only results in swapped L and R channels. The male side of the header is attached to a 3.5mm TRS cable which goes to the mic.
I have received a 3.5 mm jack which I’m going to attempt to fit inside the camera but the space is quite tricky, not sure if it will work.
You may not need to disconnect the external mic, I found that the camera doesn’t pick up much sound with my rode mic connected. If I wanted to disconnect the internal mics I would probably cut the two traces going to the flex connector with a sharp blade. Alternatively remove the filter caps and connect mic on the side of the IC.
Have you considered a 5-pin 3.5mm female jack that will mechanically switch the connection if a external mic is plugged?
Not sure if your blog allows links, here is the diagram of the jack:
https://ak1.ostkcdn.com/images/products/is/images/direct/5667717d40f44940b54c0d9af4be60091848bc62/3.5-mm-Audio-Jack-Connector-PCB-Mount-Female-Socket-5-Pin-PJ-307-20pcs.jpg
I don’t have this camera yet but I’m considering it if a jack can be added
You can probably cut the traces to the internal mic and rewire it, might need some additional switching circuitry to handle both channels. The main limitation will be space as there won’t be enough to fit this inside the body.
Well done for being creative and taking the time to share this with the world:)
I’ve got a GX80 that I love – but it has the worse internal mic in the world meaning that any decent video needs a lot a post work done using a powered external mic and recorder (plus extra work in Audacity more often than not).
The flimsy battery door hinge on the GX80 has just broken so I need to lift the rear panel to replace that anyway – and I will certainly wire an external jack up as you suggest while I’m there! Fingers crossed it works 🙂
Many thanks…